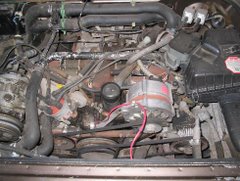
It's the night before the workshop and I just want to quickly post the photos I got to take of the stripped e-Van on Thursday in order to illustrate the upgrades described in the previous post!
 Back on the lift at NMTCC again.
 Interior. The empty battery box on the left will stay empty -- no more batteries under passengers! On the right there will be 7 pairs of batteries (the old ones are laid out here to show how much space that will take).
 As mentioned in the previous blog post, students in all three of Bill's classes performed the disassembling of the van. Many thanks to them!
 The motor mounts were rusty and needed a protective paint job. This closeup shows the fabricated parts joining the electric motor mounts to the existing Vanagon engine mount (the long piece in the rear of the photo below).
 Vacuum pump close-up. There was a lot of corrosion on the pump -- remember an earlier blog entry where we were puzzled because we thought it was leaking oil? Actually it was sucking up brake fluid, a highly corrosive substance which damaged the pump enough that it really doesn't function so well any more. A new vacuum pump will be installed during the workshop, this time with a 'trap' (like in ordinary sink plumbing) so that brake fluid stays low and doesn't make its way into the pump itself!
Above is some of the old battery retention framework, which needs to be refabricated to accommodate the new configuration. This time around we will mount the batteries similarly -- by bolting the metal retainers to the van structure -- and then build clear plexiglas battery boxes around them. The batteries will be secured, but also visible instead of stowed away behind steel! Because we use the e-Van as a teaching vehicle it's important to have its components out there and viewable. Even more importantly, with lightweight plexiglas covers the batteries will be easily accessible for regular watering. No more hefting heavy steel box lids!
Battery box measurements -- from this we need to calculate the amount of plexiglas to purchase. Frankly, I wish Bill had gotten one of his students to do that too! Isn't there a program somewhere on the web that will just Do This Automatically for you? Well I kind of got that -- sent the numbers off to my math whiz partner Matt along with the size of 1/8" plexiglas sheet that our locally-owned hardware store sells and he crunched the figures and told me I needed to pick up 3 36x72 inch pieces of plastic tomorrow night. Whew.
I am really excited for tomorrow. Unlike two years ago we have quite a clear plan in our minds -- but I do know from experience that there are likely to be all kinds of exciting ups and downs and wrinkles along the way! I look forward to sharing them all with you, and thanks for following along.


No comments:
Post a Comment