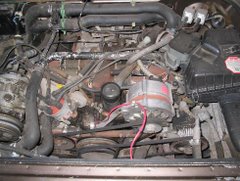
Today I brought our 1991 Dodge Colt EV over and after the a.m. lecture on chapter 8 of Convert It everybody got to examine and drive it and ask questions, only some of which I could answer!
The big missed photo opportunity of the day was the EV being rolled into the shop to get its batteries watered instead of driven in. Why? Because after having been driven by everyone and neatly parked, it suddenly would not start up again. Hmmmmm. Now we learned how to trouble-shoot a non-starting EV.

First, check the throttle linkage to the potbox. This, I learned, means press the accelerator and check to see if that switch on top moves when you do it. The potbox opens the connection to the controller according to how much the throttle is depressed, which allows you to speed up and slow down. If it moves, it works.
 Since the potbox communicates with the controller, as both our auto techs and Mike immediately pointed out, now we had to check the controller. First step: is it powered? When I turn the key in the ignition, the controller turns on via the auxiliary 12-volt battery (which operates all the electrical systems in the car: windshield wipers, turn signal indicators, lights, heat, and so forth -- and also sends power to the controller). So, check the auxiliary battery. It turned out both contacts were loose, and one fell off when Paul touched it. After he cleaned and tightened them, the problem was solved.
All our battery posts and contacts need cleaning on the EV, I was informed, and there is one "temporary fix" where someone bolted down a connection instead of crimping the lug and another lug that's broken. Everywhere that this is the case (and also where the auxiliary battery is touching metal), resistance is being created and voltage is leaking out of our system. This probably explains why the Colt's performance has been lackluster. I was unable to convince anybody that cleaning cruddy contacts on our other car was a legitimate part of the conversion workshop curriculum, so I guess we will have to do our own maintenance ... though the batteries did get watered!
After lunch we had a planning meeting and got a master schedule up for the next four days. It felt great to have jobs identified and a sense of the time frame.
The big hurdle of the week has been the adaptor plate that connects the transaxle to the electric motor. It needed to be modified to work on a Vanagon, and Bill and Larry and Barry have been laboring for a couple of days on it and coming up with possible workarounds in case we couldn't get it re-machined. Today the school machinist kindly performed the modification for us and now we can move on mounting the motor and transmission -- whew.
Similarly, we were stumped for a bit on battery box fabrication because when we were planning to use aluminum, we lacked both materials and a TIG-certified welder. (One thing I have learned from this course is that welding aluminum is much more difficult than welding steel, and lots of extraordinarily competent metalworkers turn pale and shudder when you ask them if they happen to be TIG-certified.) Once we switched over to steel, all we lacked was materials (though we will be able to use all the help we can get with fabrication), and of course now we needed them immediately, but fortunately there is a supplier not far away and after a little more sweating and squirming we also figured out a way to pick our 4 8x10 sheets up first thing tomorrow morning -- thanks to Larry and Larry's wife's F-250.
Here are some websites I wish I had looked at for ideas about battery box construction before the end of the first week!
http://www.cameronsoftware.com
(very nice set of tables and considerations)
http://www.evadc.org/build
http://www.driveev.com/jeepev
We had a field trip in the afternoon, which I think I will document in a separate post.