Larry and John began the day inspecting their initial work on the battery racks.
 One wasn't quite square, so our youngest participant Mike got to learn to weld -- and how to grind off welds!
Now the sides are mounted and ready to weld on.
 Meanwhile Judy and Chris were fabricating washers on the punch press.
 These big square washers will go underneath the van to support the bolts that hold the battery racks to the van's sheet metal.
 Meanwhile Judy and Chris were fabricating washers on the punch press.
 These big square washers will go underneath the van to support the bolts that hold the battery racks to the van's sheet metal.
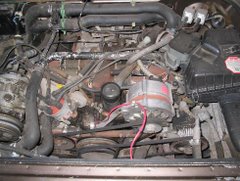
 Back in the auto shop, Nick -- who's an automotive repair professional -- supervised Vincent, Rob and Rudy in installing the motor.
 Here's a shot from above as the motor was being bolted onto the transaxle.
 The battery configuration group began to outline a plan on the whiteboard. First the overall battery layout ...
 and then how they'll be wired together in series.
 Bill is showing a battery cable-and-lug assembly to Paul. We had planned to reuse all our cables as they were from 2007, but in a later post to be called "Hitches and Glitches" you'll hear how that plan had to change.
 Here Paul is clamping a cable in a vise and cutting off the old lugs. Oh, well.
 Our two Johns -- both automotive technology instructors, one at NMTCC and one at Berks Career & Technology Center -- confer while looking for a tool.
 Brett headed up a small crew making plywood rests for the batteries to sit on inside the metal racks.
 Lynn, a veteran of the 2007 workshop, consults with Bill and students.
 The old bolt-holes in the floor of the van don't fit the new battery box configuration, so they need to be mended.
 David, who in real life is an aerospace engineer specializing in electronic communications, told me that the tool he's using above -- kind of like a pair of scissors powered by a compressor -- is called an "air nibbler". Now that is a picturesque name for a tool.
 Here he is snipping steel from the old battery boxes to patch the bottom of the van. (It will be pop-riveted in and then sealed with silicone.)
 John is fixing something with duct tape. For once, a shop item I didn't have to ask the name of.
 The whiteboard consultations continued ...
 for quite some time.
 Over in the machine shop, Larry and Nick introduced Rudy, Rob and Vincent to welding.
 This is someone's first weld, but it's hard to say whose!
 J.J. and Leo are placing the batteries around the engine compartment lid, while Brett has his tape measure at the ready. They're not just checking for sizing but also orienting the positive and negative terminals for the wiring.
 After lunch Matt, who is a battery professional, gave a lecture on different battery types going into their chemistry in more depth than is provided by our textbook, Convert It by Mike Brown and Shari Prager. The clarity of Brown's instructions and theoretical overview make it an excellent basic text, but it is an older book -- so it was wonderful to have a student step up to offer an introduction to contemporary battery technology!
 Then it was back to the labs for more hands-on work. When questions came up about wiring in the controller, it was time to consult the manual that came with the original conversion kit from EVAmerica. Containing all the schematics and instructions for the various EV components, this is our workshop bible.
By the end of the day we had accomplished our major goals:
 marry the motor back onto the transaxle
establish battery configuration and wiring
 and complete the first battery rack!
Chris has primed and painted the bare sheet metal,
and it's ready to go in!
I took headshots of most of the students today and will introduce them one-by-one in a later post.
Till tomorrow, thanks for following along!
Till tomorrow, thanks for following along!